This Needs To Be Part Of Your Lightroom Workflow
Many of us fall into routines when it comes to editing photos, sticking to the same tools and techniques that we're comfortable with. While there's nothing wrong with this approach, it might prevent you from exploring some of Lightroom's other powerful features. One tool that often flies under the radar in Lightroom (whether you’re using the mobile, desktop, or web version) is "Versions." If you're familiar with Lightroom Classic, think of Versions as a more versatile sibling to virtual copies.
If you're new to using Versions in Lightroom, you should first watch the vide in this article because it dives deep into how it works. When you're done, this article and video will help you get even more out of Versions in Lightroom.
Why Use Versions in Lightroom?
The versions tool in Lightroom is incredibly useful for preserving different editing states of your photos. It allows you to experiment with various treatments and save your progress without overwriting your original edits. The best part? The Versions tool is available across all your devices, whether you're on Lightroom Desktop, Mobile, or Web. Here are some practical ways to incorporate versions into your Lightroom workflow:
1. Preserve Your Original Edit
One of the most straightforward uses for versions is to preserve your original edit. Let’s say you edited a photo years ago in a style that you might not necessarily align with anymore. Instead of overwriting or deleting that version, save it as a reference point to track your growth as an editor.
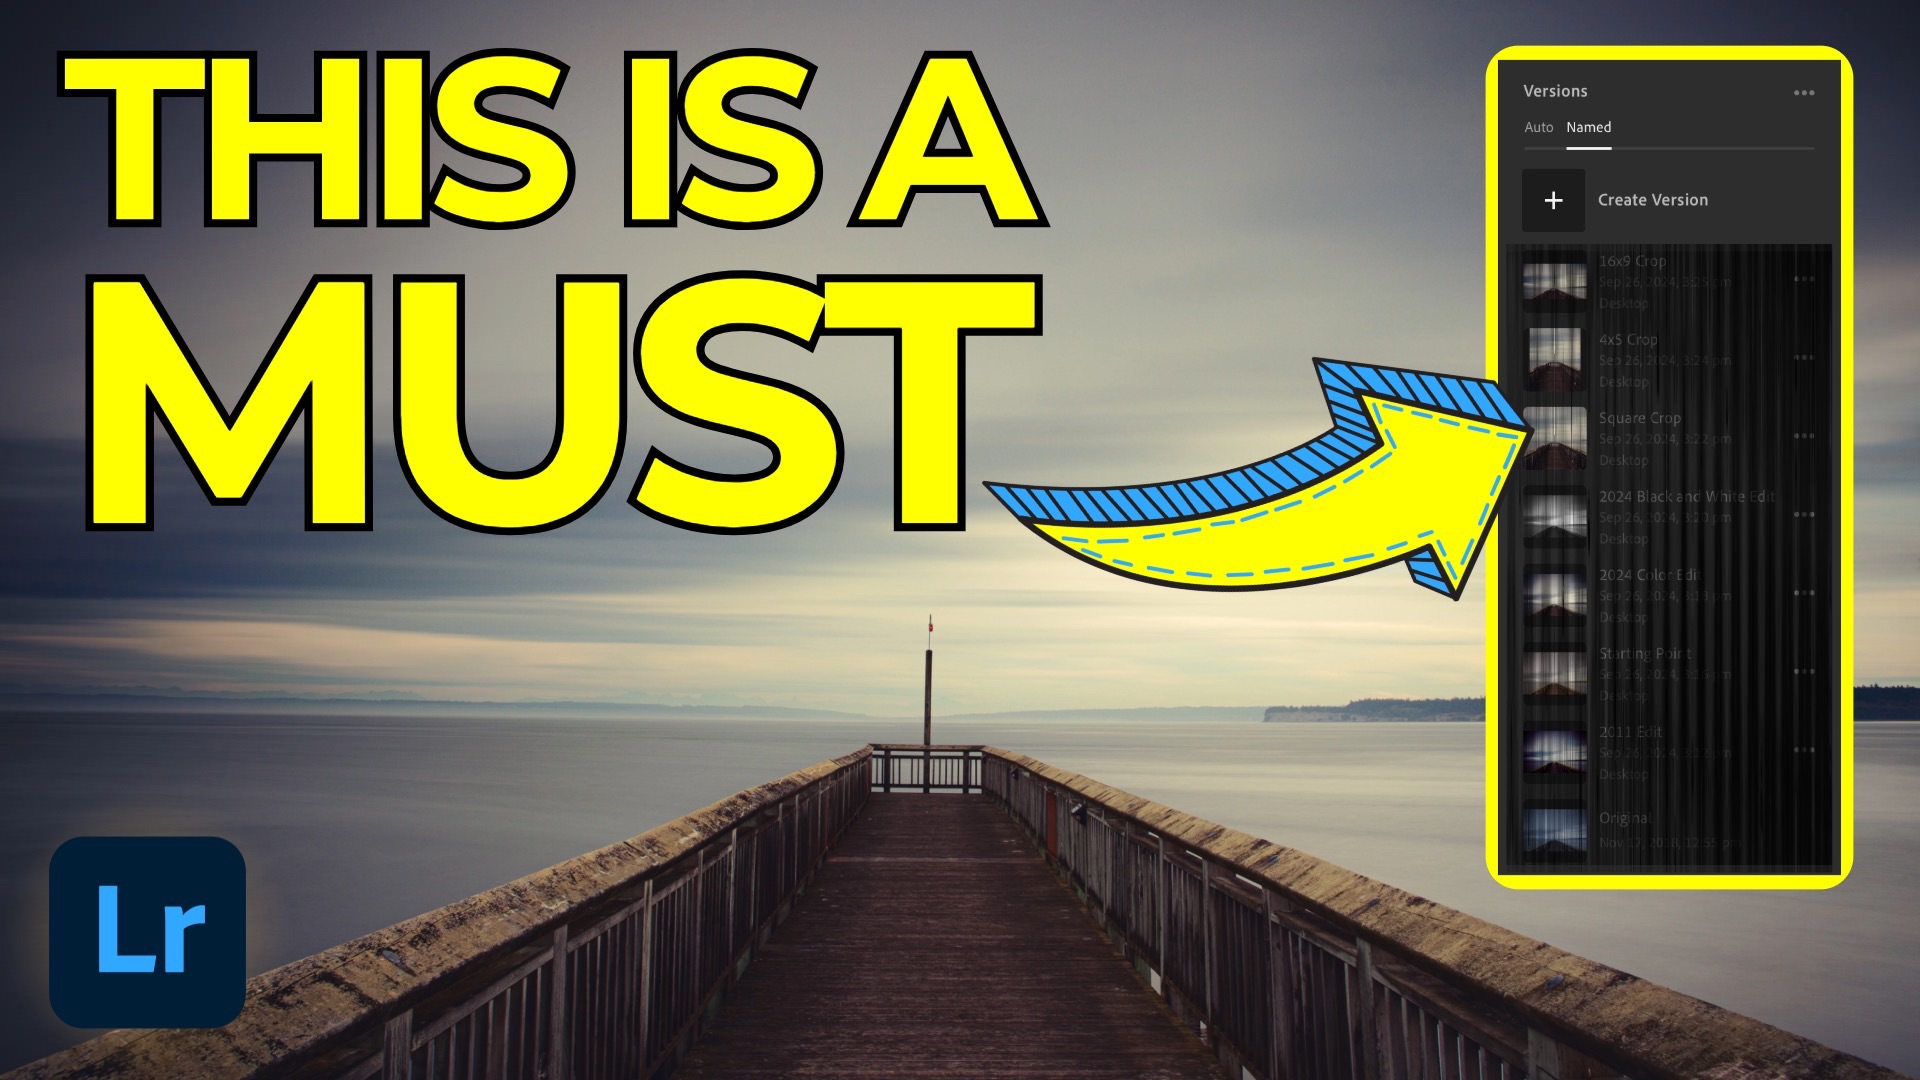
To do this, go to the Versions icon, click on the Named tab, and select "Create Version." You can name it whatever you like—something like "2011 Edit" or "Original Edit" to keep it descriptive. Now, you’ll always have this original version saved, allowing you to snap back to it whenever you want.
2. Create a Starting Point for Future Edits
Imagine you've just made some basic corrections, like adjusting the white balance, removing distractions, or tweaking the tone and color. This would be a great starting point if you want to explore different editing styles. Save this as a version named "Starting Point," so you don’t have to redo those basic corrections each time you want to experiment with a new look.
Saving a starting point allows you to come back to a neutral state without having to redo the initial steps, which can be a big time-saver when trying out different creative directions.
3. Experiment with Different Treatments
Versions are an excellent tool for exploring various treatments on a single photo. Let’s say you’re experimenting with color grading, tone adjustments, or adding a favorite S-curve. Save each of these different treatments as individual versions. For example, if you create a color edit, save it as "2024 Color Edit." If you decide to try a monochrome look, save it as "2024 Black and White Edit."
Having these different versions allows you to switch between various looks easily and even export them without reapplying edits. Just click on the ellipsis next to a version and choose "Export with These Settings." You can also batch export all your versions, making it easy to share multiple treatments at once.
4. Prepare for Social Media Sharing
One of the most practical uses of versions is for sharing on social media, especially on platforms like Instagram where different crops are often required.
Let’s say you want to create a square crop for Instagram. Set your crop aspect ratio to 1:1 and position it as desired. Then, save this as a version called "Square Crop." Now, if you want to also create a vertical 4:5 crop, change the aspect ratio, and save it as "4x5 Crop."
Having these versions handy means you can quickly switch between different crops, export them as needed, and ensure they’re optimized for various social media platforms. You can even create a 16:9 crop version if you plan to share your images in a more cinematic format, or to use in a YouTube thumbnail. This makes versions a powerful tool for managing different formats and ensuring consistency across all your shared content.
How to Access Versions Across Devices
One of the best things about versions in Lightroom is that they sync across all devices. So whether you’re editing on your desktop, tablet, or mobile phone, your versions are right there with you. This seamless integration makes it easy to continue working on a photo regardless of where you are, giving you a smooth, consistent editing experience.
It's Time to Learn How To Use Lightroom Everywhere!

If you enjoyed this article and want to learn how to get the most out of Lightroom's cloud-based ecosystem on the desktop, smartphone, and tablet, then you should check out my Lightroom Everywhere course! It has over 10 hours of easy-paced lessons that'll teach you how to make the most out of Lightroom Desktop and Mobile.
The Only Course Designed to Help You Use Lightroom Everywhere!


