This One Lightroom Setting Instantly Improved My Panos
As photographers, we often develop routines in our editing workflows. We find what works and tend to stick with it, whether it's a favorite preset or a familiar way to use the point curve tool. However, it’s important to remember that tools like Lightroom offer multiple ways to achieve desired results, and sometimes stepping out of our comfort zone can reveal new possibilities. One tool that often gets overlooked in its full potential is the Panorama (Pano) stitching feature in Lightroom.
The Backstory: A Trip to Northern Georgia
Recently, I took a trip to northern Georgia where I photographed some stunning waterfalls. In some cases, I captured a series of individual images with the intention of stitching them together into a single panoramic photo. As I worked on stitching these photos together, I realized I had been missing out on some crucial options that Lightroom offers, which can significantly impact the final result.
Setting Up the Shot

For this particular pano, I used my Sony A7R Mark V with a 24-70mm F2.8 lens, set at 24mm. The camera was mounted on a Really Right Stuff tripod with a leveling base, ensuring that the camera was perfectly level for easier pano stitching. The images were taken in vertical orientation, which allowed me to capture a wider and taller composition.
Pre-Stitch Adjustments
Before stitching the images together, I made a few essential adjustments:
- Profile Selection: I started by applying the Adobe Landscape Profile, which I find suits my style best. This profile is subjective, and you might prefer another based on your taste.
- White Balance: Using the white balance dropper, I sampled a neutral area in the image (in this case, the water) to correct any color cast.
- Lens Corrections: Finally, I enabled lens correction to eliminate any barrel distortion that the lens might have introduced.
 These basic adjustments were then copied to all the images in the series before stitching them together.
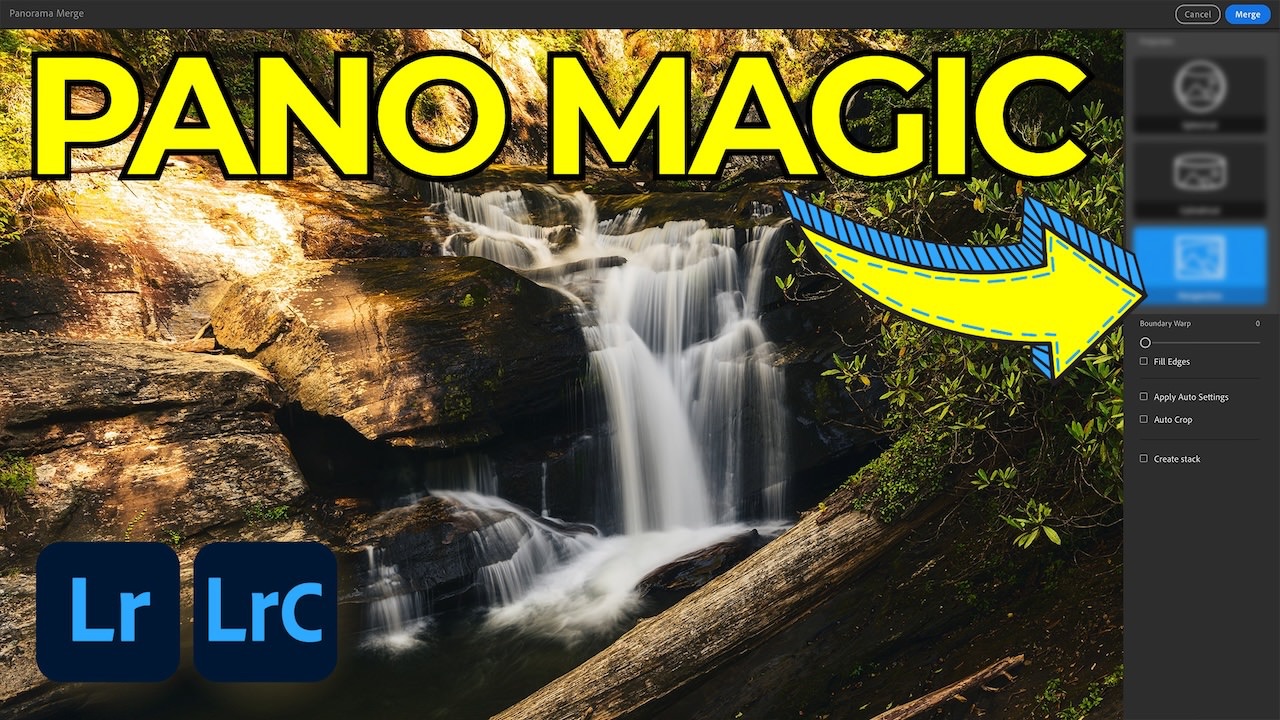
The Importance of Projection in Pano Stitching
Once the images were prepped, I selected them and initiated the Panorama Merge process in Lightroom. Here's where I encountered a common pitfall: overlooking the projection options.
Lightroom offers three projection methods for pano stitching:
- Spherical: Often considered the best all-around option, but it may not always be the best choice for your specific scene.

- Cylindrical: Preserves vertical lines best and can be ideal for single-row panos.

- Perspective: Maintains straight lines in both vertical and horizontal directions, making it suitable for scenes with strong linear elements.

Initially, I mindlessly chose the spherical option, but upon closer inspection, I noticed that it caused a tree trunk in the foreground to bend unnaturally. Switching to the perspective projection corrected this issue, keeping the tree trunk straight and true to life. However, this projection did result in some loss of image information along the edges.
Fine-Tuning the Stitch
To address the loss of information, Lightroom provides a few options:
- Boundary Warp: This slider helps fill in the lost areas by warping the image slightly. It’s a delicate balance—too much warp can reintroduce unwanted distortions.
- Fill Edges: This option uses content-aware fill to generate pixels in the blank areas, but it may not always produce convincing results. It works best when you need to fill in small areas.
- Auto Crop: Enabling this option will tell Lightroom to crop in so that only visible pixels are displayed in the composition. This may not always be the best option, which leads me to Option #4.
- Manual Cropping: I prefer this method for retaining control over the final composition. It allows me to crop the image precisely without relying on automatic adjustments.
Enhancing the Final Image

Once the pano was stitched and cropped, I moved on to refining the image:
- Exposure and Contrast: I adjusted the overall exposure, highlights, and shadows to enhance the dynamic range.
- Color Grading: Using the color grading panel, I added a subtle blue tone to the shadows, giving the image a cooler feel that complemented the scene.
- Sharpness: I carefully applied sharpening, ensuring that only the areas that needed it received the adjustment, thanks to the masking feature in Lightroom.
One of the final touches was using Lightroom's powerful masking tools to selectively boost the greens in the foliage. By using a combination of linear gradient and color range masking, I was able to isolate and enhance the greens without affecting other parts of the image.
Stay Curious with Your Tools
This experience reminded me of the importance of exploring the full capabilities of the tools we use. In Lightroom, features like projection options in pano stitching and advanced masking can make a significant difference in the quality of our images. Don’t settle for the default settings—take the time to experiment and see what else is possible.
If you’re interested in learning more about advanced techniques like masking, I’ve recently launched a course called Lightroom Masking Essentials. It’s designed to help you master these powerful tools across all versions of Lightroom. Whether you’re using Lightroom Desktop, Classic, Web, or Mobile, this course has something for you.
The Only Course Designed to Help You Use Lightroom Everywhere!


