Lightroom Masking Tutorial: How to use Intersect

In a recent video, I shared a deep dive into the new masking tools that Adobe added to Lightroom after their 2021 Adobe Max conference. My goal with that video was to provide a more general overview of the new masking tools so that anyone can quickly jump in and begin using them with confidence.
And I applied that same philosophy to my own photo editing. The more I’ve used these masking tools, the more impressed I’ve become because they open up so many opportunities to make precise selections during post-processing. However, after sharing last week’s video, I received a number of requests asking to explain a specific masking feature that I didn’t cover. That masking feature is called Intersect.

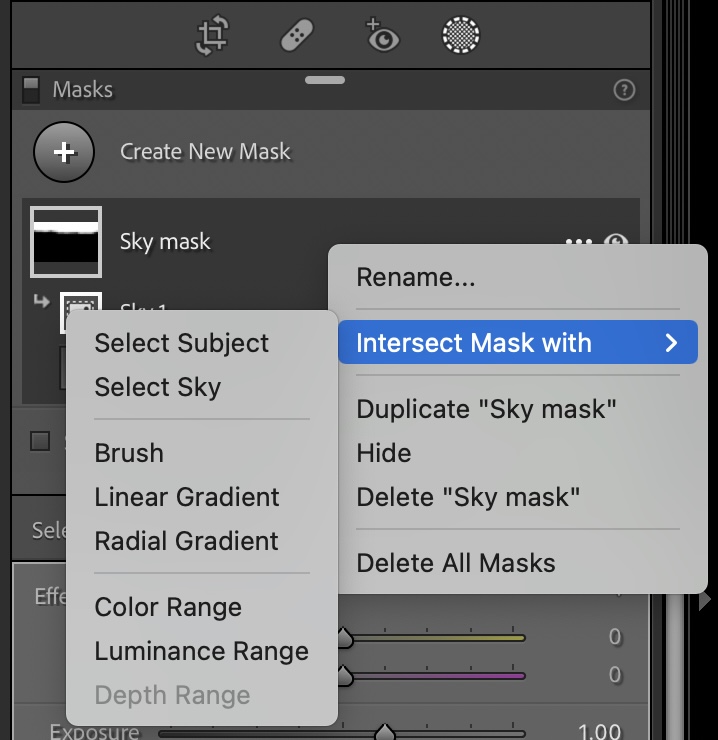
Intersect is one of those tools that can be tricky to grasp at the beginning, but once you wrap your head around it, you’ll quickly realize just how powerful it is. Another thing that can add to the confusion around Intersect is that the menu item with that specific label is only available in Lightroom Classic.
BUT, that doesn’t mean that you can’t achieve the exact same results in Lightroom CC or even Lightroom Mobile! It just requires an extra step, which I go over in this video. But, in case you don’t have time to watch it, the basic gist of using the Intersect function in Lightroom CC and Lightroom Mobile is that it is a combination of “Subtract” and “Invert” on your initial selection. You can also follow these basic step-by-step instructions:
Step 1. Make your initial selection. This works especially well when using the “Select Subject” or “Select Sky” options.
Step 2. Click on “Subtract” and choose the selection method that works best for the situation. Then, make your subtract selection.
Step 3. Finally, click on “Invert” and you’ve now replicated the Intersect tool.
I hope these instructions (both written and in the video) inspire and excite you to take a serious look at the Intersect tool and how it can make localized editing more powerful than ever before!


